Showing posts with label View all projects. Show all posts

Tuesday, July 24, 2012

New Look 6123 - dress with side drape


Oooooh I love girlie-girl dresses! Husband and I were invited to his cousin Stephanie's wedding last weekend. The sweltering Ontario heat screamed for a cool summer dress, and besides, everything I own is black, black or black...not inappropriate for a summer wedding, but can be a bit drab in my opinion. Here, I used a piece of fabric from my stash, a challis I believe, in a black background with vivid pink and purple flowers. Like? 


I bought this pattern on sale for $1.99, and was drawn to the versatility of the various options (see pattern pic below). I decided to go with the side gathers and side drape, as well as short sleeves. I was a little concerned that the side drape would make my hips look wider, but I'm surprised at how flattering it is. I think this pattern would actually be suitable on many body shape types; the cross-over top is shapely, the waistline and runching gathers are slimming and add definition, and the drape is elegant and feminine. 


Husband and I got dressed up, and headed off to the Green Door restaurant for lunch before going to the church for the wedding ceremony. A lady walking by near the restaurant told us we looked "just gorgeous"...this pattern, with the side drape, really did make me feel glamorous. It's not often we get all dolled up, such fun!

I was so pleased with how this dress came together that I promptly chose 3 other fabrics and cut out different variations of this pattern, assembly is ongoing but I'll post pics as I finish them. I added some length to the skirt, because I prefer skirts that skim or come just below the knee. I usually have to modify my tops to ensure my cleavage is adequately covered, but here the sizing was right-on and the muslin fit beautifully across the chest. I did, however, add 1.5 inches to the the waistline on the top. I have a long torso, and find dresses with a seamline across the waist is usually placed too high, usually it winds up halfway between my chest and waist. so I added length to the front and back top pieces. Worked like a charm!

This one is a keeper, give it a try!


Here are the pattern and technical drawings:


Here are the comments I posted on patternreview.com:
Pattern Description: 
Misses' dress with sleeve and bodice variations including flattering drape and ruffle detail. 
Pattern Sizing:
A (8-18)
Did it look like the photo/drawing on the pattern envelope once you were done sewing with it?
Definitely!
Were the instructions easy to follow?
Yes, no problems.
What did you particularly like or dislike about the pattern?
I love the styling, I felt very fancy-schmancy with the side drape - it's not something I ever envisioned myself wearing, and it looked great!
Fabric Used:
Rayon challis (I believe, it's been in my stash so long I don't know for sure)
Pattern alterations or any design changes you made:
I added to the length of the skirt by 2" but otherwise it was great. The sizing was well done, I usually have to raise the neckline on tops to ensure my cleavage is reasonably covered, but when I made the muslin it was already perfect...sexy for evening, but still appropriate for work.
Would you sew it again? Would you recommend it to others?
After making the first one, I promptly cut up 3 more versions in different fabrics, will post shortly :-)

Sunday, June 17, 2012

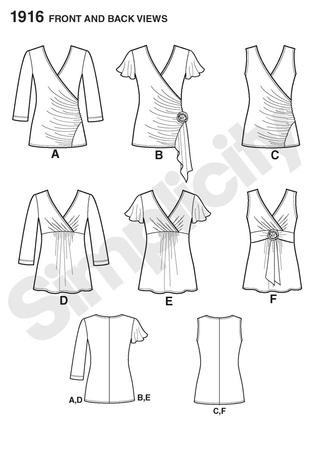
Simplicity 1916 - knit wrap top

After 3 months of no time for sewing, thanks to a long daily commute that has now come to an end, I finally got around to finishing this little number - a simple knit top. It's a great wardrobe-builder, simple but elegant styling and would look great with either casual jeans or a more business-like black skirt. I can't wait to try the other variations.


Here are the technical drawings. I made version "A' but cut out the sleeves short. I figured it would work better for both summer and under a little sweater or suit jacket for winter that way. I didn't bother making a muslin this time as a test run, I find patterns for knit tops usually work out just fine.

The fabric is a lovely purple knit, just the right medium weight and super-soft, something I picked up while on a trip to Germany.


I didn't make any structural modifications to the version I've posted here, but I did have to fix up the neckline by sewing the front pieces that crossover together. Otherwise, it was rather low-cut and the "ladies" were fully exposed. I almost ALWAYS have this problem with cross-over tops, stuffing DD-size boobs into this style without looking like a snarky tart can be tricky.

Next time I'll modify the front pieces like this to provide a little more cover:

Here are the comments I posted on patternreview.com:

Pattern Description: Misses' knit wrap top with sleeve variations.
Pattern Sizing:
6-14, and 16-24 (also available as printable online)
Did it look like the photo/drawing on the pattern envelope once you were done sewing with it?
Yes
Were the instructions easy to follow?
Yes
What did you particularly like or dislike about the pattern?
It was so simple to make, I plan to try all the variations in order to build up my wardrobe! 
Fabric Used:
Some kind of knit, probably poly.
Pattern alterations or any design changes you made:
Too low cut. I will have to make adjustments to the neckline next time, I found the finished top was too revealing for the "ladies" - I ended up having to stitch the overlapping pieces together a little higher up, so that I can wear the top to work. 
Would you sew it again? Would you recommend it to others?
Definitely!

Link to post on burdastyle.

Sunday, March 4, 2012

Making a muslin

For years, I avoided making muslins. "What?!? I have to make a rough draft first? That's like, waaaay too much work." And then, after the disappointment of a few ill-fitting projects that now lie in a crumpled heap at the back of my closet, I realized that achieving perfect fit in sewing takes not only skill and experience, but also patience and dedication. I marched on down to my fabric store and bought myself fabric to use in making muslins... 


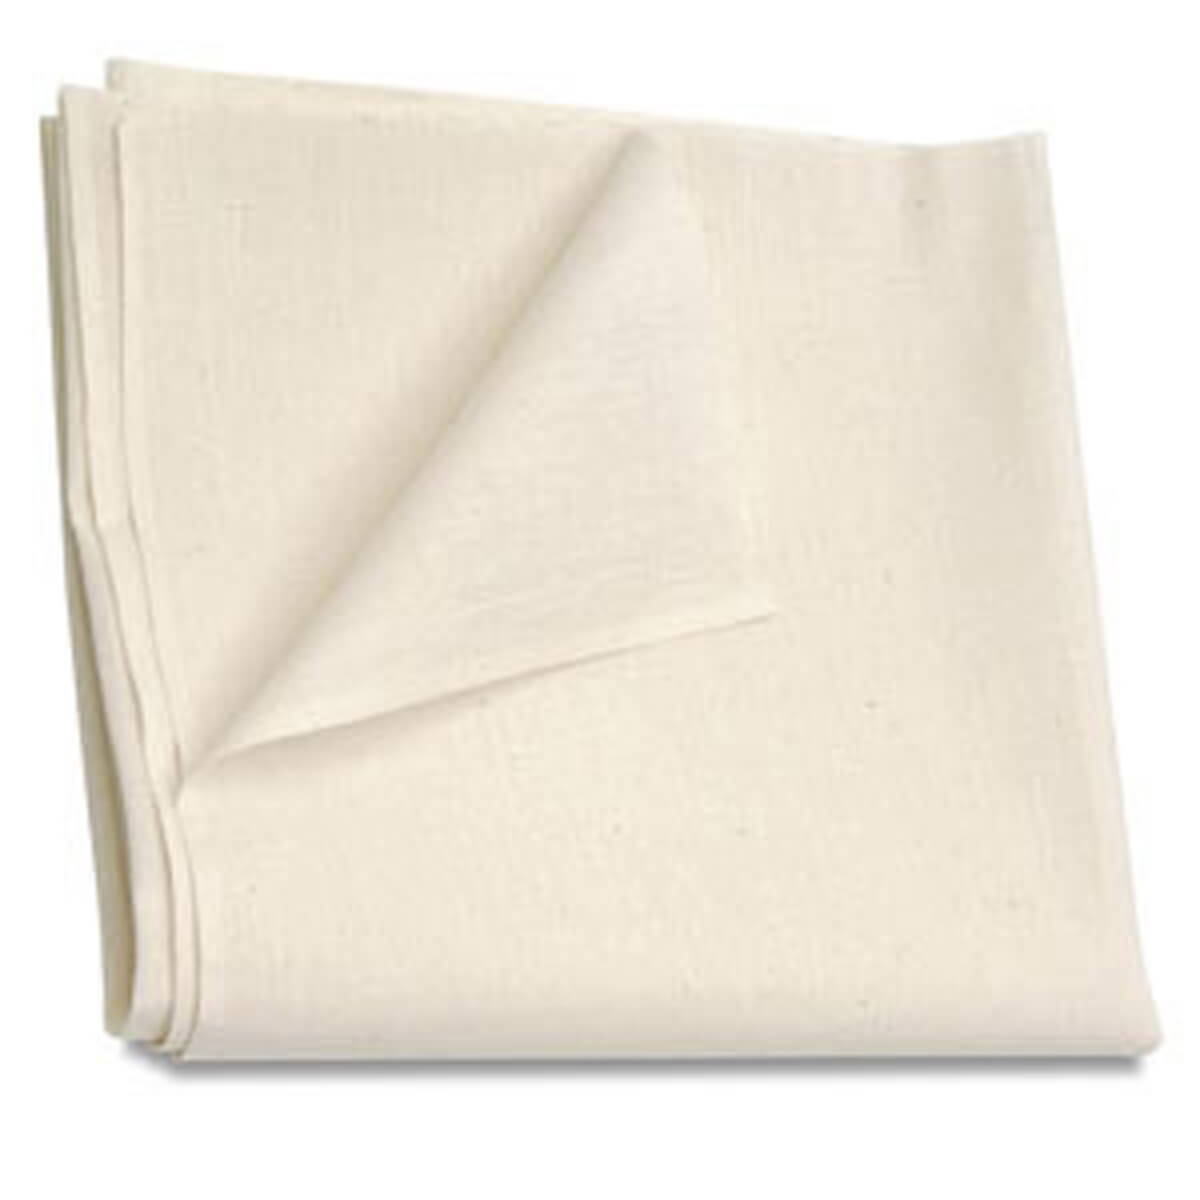
What's a "muslin"? Muslin is technically a type of thin cotton fabric (at right), but it is often used to create pattern pieces - so "making a muslin" has come to mean cutting, fitting and sewing a rough draft of your garment to ensure you've got the proper fit before you cut into your good (and likely much more expensive) fabric.

I make muslins using whatever inexpensive fabric 
I can get my hands on, usually a thin cotton with no stretch to it - basically, any fabric that is similar in nature to paper flat pattern pieces. That trip to the fabric store I mentioned, I bought a bolt of beige cotton fabric that was marked down because it had grey discolouration running through it. The entire bolt cost me about $6, and will make about 8-10 rough drafts of projects I want to make. 


Give it a try! 
Here, I'm making a pencil skirt muslin...


Cutting the pieces
- cut out the commercial paper pattern pieces in your size
   *if you're unsure at all of the pattern sizing/fit, cut 
     a larger size to be safe
- lay them out on your muslin fabric
- trace the outline using a pen, making any major 
    adjustments you already know you need to add in

With this skirt pattern, I knew the short was too short (pic left)and that I also wanted a little extra fabric along the back seam for the zipper (pic above).

- now transfer any markings as well (ie, darts)
- cut out your new muslin pattern pieces


Sewing the garment
- sew major seams together following 
    your pattern instructions
   *major seams = shoulders, sides, darts, etc
   *use wide stitches, you'll want to be able to 
     rip them out easily afterwards
   *if putting in sleeves, make sure to adjust 
     and sew at your 'true shoulder'
   *this is a rough draft of the finished item, 
      don't bother with hemming or 
      finishing the inside seam allowances!
- try your muslin on, and adjust the fit by taking seams in further as needed or ripping apart and re-sewing areas that need to be adjusted in order to achieve a better fit


Here, the skirt was still too wide at the hips, back darts a little pointy, and look at how the front waistline is higher that the back - I created a new side seam about 1/2" inside the original sewing line, adjusted the darts, and the cut 1/2" off the top front to make sure the waistline was even all the way around. I also decided the taper in the side seams (pic at right) so that the bottom of the skirt would taper in towards my calves rather than hang straight down from my hip.


Finishing the muslin
- lay your garment out on a flat surface
- using your marker, trace a dashed "sewing line" 
    along your stitches
- trim the fabric about 1/2" away from your 
    stitches, this creates your seam allowance
- now rip out your stitches and remove zipper
    (if used)
Using your marker, name each pattern piece so you know what's what and transfer over any other important markings (ie, hemline or changes to dart position).

Voila! You can toss the paper pattern pieces or give them to a sewing buddy, you now have perfectly-fitting muslin pieces of your own to use again and again. Fold them up and put them back in the commercial pattern envelope or use a medium-size plastic zip baggie to keep everything together.


What about making a muslin from an existing piece of clothing? It can be a bit tricky, especially if you don't want to cut up the item into it's individual parts just yet. Just lay the item out on your muslin fabric, and try your best to trace around lines where the item was sewn together. The biggest difference = add your seam allowance! It's already included in commercial patterns (most likely), but you'll need to use your imagination a little if you're trying to create a pattern to recreate beloved items from your closet. Remember - it's a muslin, it's ok to mess it up or have to redo it, the whole point is to play/adjust/fix now instead of after you've already cut into your good fabric! 


What about knits? Honestly, I made one cotton muslin for a perfectly-fitted simple jersey top (from my favourite t-shirt) and I use that to compare against any commercially-made pattern for knits that I intend to use. Is the pattern as wide/long as my perfect muslin piece? Yes? Then I just go for it. The stretch in knits is so forgiving, I usually don't make a muslin unless the pattern is very unique and might not look quite right on my body type without adjustments. But, if you are concerned and want to make a muslin, your best option is to buy an equal amount of cheaper "fashion" knit and test out the pattern first following the guidelines above, and then copy the pattern to a sturdy cotton for future projects. Why not make a muslin out of the cheaper "fashion" knit itself? Knits ravel at the sides, and unless you're interested in putting little weights all around the edges to keep the cut pieces flat, stick with a test run of the commercial pattern and then make your cotton muslin pieces.


Do you have to make a muslin every single time you try out a new pattern? No, not necessarily. If you already have a muslin that is similar in shape to the pattern you want to try, much like with my example of the perfect simple jersey top, you can simply use your muslin to judge if there will be any problems with the commercial pattern's sizing.

But apart from that, don't skip making or using an existing muslin when sewing! Not only do you end up with a properly-fitted garment, but you now have reliable pattern pieces for future garments of the same style. It's a lot faster to throw together a new dress if you know you can count on the sizing of the muslin when cutting out and sewing together your pieces. Having said that, making a muslin does NOT mean you shouldn't still check the fit when sewing your final garment...always try your garment on as you go along. Any changes that still need to be made = don't forget to make them on your muslin as well so the next time things are even more perfect!


Happy sewing!